Simply Sensational Caramelized Onions

Caramelized onions are terrific on everything… pizza, burgers, hotdogs, chops, steaks, brisket and are delicious in scrambled eggs, quiche or mashed potatoes….they even make an interesting (and delicious) dessert when served on sliced apples with a side of cheese. In fact, they’re great all by themselves…I guarantee you’ll find yourself eating them right out of the pan.

I think that I first read about this technique for caramelizing onions in Cook’s Illustrated Magazine years ago and have been using it ever since.

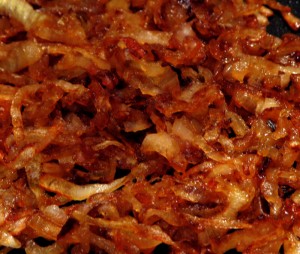
When onions are cooked low and slow for an extended period of time, the natural sugars in the onions caramelize, imparting an intense sweet flavor and a beautiful deep mahogany color.

Caramelized onions can be stored in an airtight container in the refrigerator for up to 2 weeks or they can be frozen for up to 3 months.

Please click here for the printable recipe.
OXO Pop Up Vegetable (and Chicken Wing) Steamer

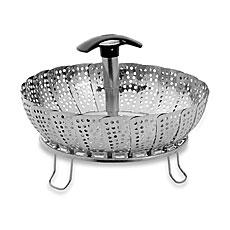
OXO Vegetable SteamerAlthough I did post a technique a while back for simply steaming a small quantity of vegetables, there are times when that method isn’t practical (like for prepping my Oven Baked Buffalo Chicken Wings). For these times, I highly recommend the Oxo Good Grips Pop-Up Steamer.

All you have to do is press on the handle and it pops up to make it safe and easy to insert into and remove from a steaming pot. One of the best feature is that you can unscrew the handle and it’s then perfect for steaming larger items like fish fillets (or huge batches of chicken wings!). It has foldable feet to keep the basket above the boiling water and it also expands to fit just about any pot. It’s a really cool kitchen tool with multiple uses…a practical (and inexpensive) addition to any kitchen!

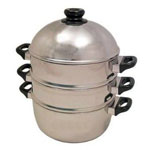
And, if you really want to steam a huge batch of wings this simple, Asian-style 3 Tiered Aluminum steamer is great…it’s also perfect for steaming a couple of different vegetables (or a variety of seafood) all at the same time for a quick, healthy dinner.

Oven Baked Buffalo Chicken Wings with Deep Fried Flavor

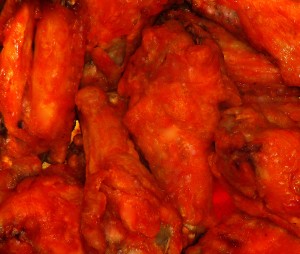
Buffalo Chicken Wings Back in 1976, I was working at The Foundry restaurant in DC and one of the waiters, Michael Murphy, who happened to be from Buffalo, told us of the amazingly simple way they prepared, of all things, chicken wings, up there at a place called the Anchor Bar. We started giving away the Buffalo Chicken Wings during Happy Hour and immediately the place became packed each day at around 4:45 pm with everyone waiting for the wings to come out of the kitchen…and the rest is culinary history. It seems that every bar today has chicken wings on the menu, and for good reason…when they’re made right, they’re incredibly and addictingly (if that’s even a word) good! They’re actually very simple to make…cut 12 wings into three pieces at the joints (discard the wing tips or keep them for preparing stock) and just deep fry the flats and drummettes for 10-12 minutes in 375 degree oil (preferably peanut) until they’re crispy and golden brown, toss them in Frank’s Red Hot Sauce and serve with celery and bleu cheese dressing…that’s it…nothing else is needed. The problem is that it’s really a pain (and a greasy mess) to deep fry at home, so here is the next best thing…bake them in the oven. The secret to getting them to cook perfectly is to first steam them in a steamer basket over boiling water for 10 minutes. Carefully pat them dry and place them on a oven proof rack (or parchment paper) in a sheet pan, sprinkle with about 1/2 teaspoon of kosher salt and place in the refrigerator for about an hour. Then stick the whole deal in a 425 degree oven and bake for about 40 minutes until golden and crispy, turning the wings over halfway through. This cooking technique is from Alton Brown, but in his recipe, he wants you to add butter and garlic to the sauce, which is absolutely unnecessary (and not authentic!). When the wings are done, just toss them in a generous helping (about 1/2 cup) of warmed Frank’s Red Hot Sauce until completely coated and serve with bleu cheese dressing and celery sticks. There you have it…all the crispness, texture and flavor of deep frying with none of the mess.

The Best Chocolate Chip Cookies Ever!

The Best Chocolate Chip CookiesThis is, without a doubt, the best chocolate chip cookie I (or anyone else) ever tasted! The recipe has been around for awhile…I believe  it was originally printed in The Frog Commissary Cookbook, published in 1985, and named for a restaurant in Philadelphia that was popular in the 1970’s.  It has just the right balance of flavors and textures. I don’t love most oatmeal chocolate chip cookies because it seems the oatmeal flavor is usually overwhelming and the texture is dry, but not with these cookies. They’re crispy on the edges and moist and chocolatey in the center…the perfect accompaniment to a cold glass of milk. One of the best things about this recipe is how well the dough freezes. I chill the dough a little and roll it into 1½” diameter logs (like the ones you can buy in the supermarket), wrap them in plastic wrap and freeze them. Then, when the urge strikes, I just slice off a few 1″ pieces and pop them right in a 350Ëš oven, and you have fresh, hot homemade cookies in about 12 minutes. You can also roll them into 1″ balls, freeze them and stick them right in the oven when you absolutely, positively immediately need a hot, homemade killer chocolate chip cookie.

Please click here for the printable recipe.
One Dish Steamed Vegetables (with easy cleanup!)

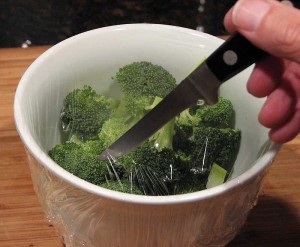
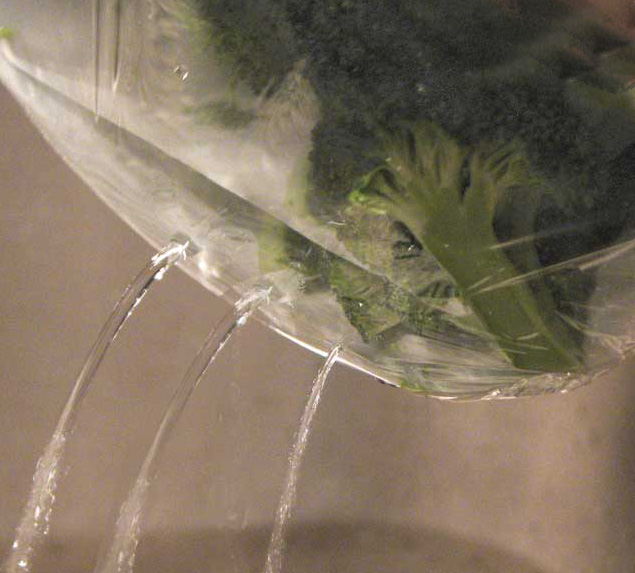
This is a simple one dish, easy clean-up technique to steam a serving or two of vegetables. I’m using broccoli here, but it works with anything. Cut the broccoli into bite size pieces, place them into a microwaveable bowl with 1/2 cup of warm water and cover tightly with plastic wrap. Take a knife and poke a few holes in one side of the plastic wrap. This is to let the steam out and, after microwaving, to strain the water through. Microwave on high for about 1½ minutes. Take the bowl out of the microwave (careful…it will be hot) and tilt it over the sink to drain the water out through the poked holes. Then just take off the plastic wrap, drop in a tablespoon of butter, some seasoning (I love a pinch of kosher salt and a shake or two of McCormick Lemon & Pepper seasoning), give it a stir and it’s ready to eat. Fast, simple, tasty and best of all, easy to clean  up!

Perfect Chocolate Chip Cookies

Chocolate Chip Cookies For those of you the regularly follow this blog (and I mean both of you, so pay attention!), you know I usually post my own recipes or my take on other recipes with my tweaks, tips or suggestions added, but I really don’t think you can improve on this recipe from Cook’s Illustrated for your basic, delicious chocolate chip cookie.  I made these last night and they were, as the title suggests, pretty close to perfect! The browning of the butter before it’s added to the recipe adds a depth of flavor you don’t find in other chocolate chip cookie recipes, or as CI puts it “A chocolate chip cookie that’s moist and chewy on the inside and crisp at the edges, with deep notes of toffee and butterscotch to balance its sweetness.” I do have one other recipe that I think compares to this for a chocolate chip cookie made with oatmeal (I think it’s actually much better!), but for now, if your jonesing for a killer cookie, try this recipe…you won’t regret it (until you try and fit into your pants the next day).

Whole Wheat Sourdough Pita

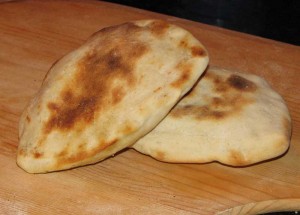
I know lately I’ve kind of been dwelling on whole wheat sourdough baking variations, but I’m on a roll (get it?). Anyhow, if you take the Sourdough Whole Wheat Pizza Crust dough recipe and divide it up into 60-70 gram (about 2-2.5 oz) golf ball size portions, flatten them out into 4-6 inch rounds about 1/8 inch thick and throw them in a 500 degree oven (preferably on a preheated baking stone, but a baking sheet works too) for 5-6 minutes (flip them over after about 3 minutes), they will puff up into beautiful, tasty pitas. It’s actually amazing to watch!

Brining…the Secret to Better Flavor and Texture

Cambro 6 qt. Container Perfect for Brining

I always prefer to brine pork or poultry before cooking. The brining process not only breaks down proteins and tenderizes the meat, but also adds moisture (through osmosis), making the meat “juicier” and also less likely to dry out when cooking.

I brine the meat in a clear plastic Cambro container as soon as I get it home from the supermarket. After brining, I wrap the parts in plastic wrap and freeze what I’m not going to use immediately. When I’m ready to use it in a recipe,  I simply defrost it, and since it’s pre-brined, it’s ready to go. Follow the jump for exactly how to do it.

Read More …

Sourdough Whole Wheat Pizza Crust

Suasage, Mushroom, Caramelized Onion Pizza ready for oven
Ready for the Oven

There’s nothing better then homemade pizza and this crust is simple and delicious. If you need sourdough starter, check out my bread post from last week, where you’ll find a link to get FREE sourdough starter. I prefer thin crust pizzas (being from the New York area…where we make REAL pizza), but if you prefer a thicker crust, it’s all here in the printable recipe below. This is one of those recipes that appears to be a little vague at first, but once you try it and get the feel for how the dough should come together, it’s simple and quick to replicate whenever you get the urge…which for me, seems to happen about 3-4 times a week lately. And since the recipe makes 3 crusts which freeze incredibly well, you actually don’t have it make it that often. Just take one out of the freezer, and in about 3 hours, it’s ready to roll. The crust is also vary versatile and can be used in dozens of different ways. Just the other day, I topped one with just caramelized onions, crumbled goat cheese and drizzled some olive oil on it and it was amazing.

For the printable recipe, please click…

Read More …

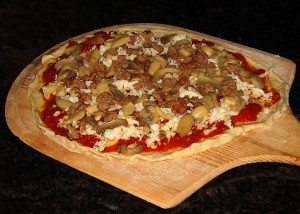
Sausage, Mushroom and Caramelized Onion Pizza with a Sourdough Whole Wheat Crust

SMO PizzaJust wanted to post a shot of the pizza I made tonight…it tasted as good as it looks. This was, of course, made from scratch and here is the printable recipe for the crust.  One of the most important tricks to making a great pizza is using a pizza stone…you just can’t bake a great crust without it. A pizza stone has a greater thermal mass then either a glass or metal pan and therefore holds and distributes heat better. It’s also porous, so it absorbs moisture from the dough as it cooks, all of which contributes to an amazing, crisp, uniformly browned crust. Also, get yourself a pizza peel…they’re inexpensive and make putting the pizza in and, more importantly, taking the hot pizza out of the oven, a breeze.

Pizza stones are available just about everywhere, and come in a variety of sizes and shapes (and prices). They should be put in a cold oven, then preheated for at least 30 minutes before using. Because they are porous and absorb liquid, the stone should never be washed with soap…just a dry brush or some plain, warm water if needed. They are also ideal surfaces for baking bread and also for making crispy, homemade crackers.

t stone or piece of ceramic or earthenware used to evenly distribute oven heat to pizzas or other baked goods, more or less mimicking the effects of cooking a pizza in a masonry oven. Such bakeware has more thermal mass than metal or glass pans. The porous nature of the stone used also helps absorb moisture, resulting in a crisp crust.