Extra Large, Cage-Free, and More: How to Shop for Eggs | Serious Eats

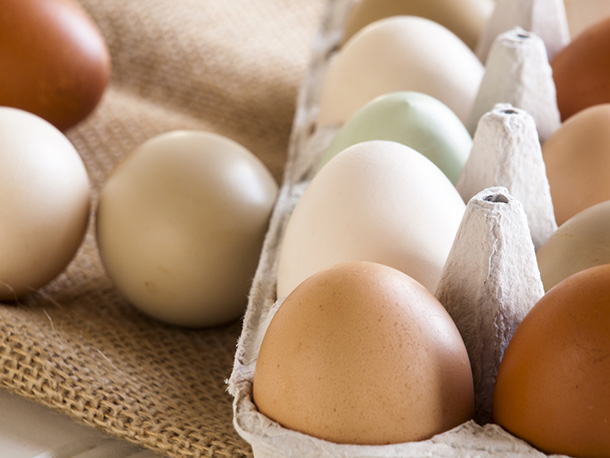
What makes a good egg? There are so many things to consider, especially when egg carton vocabulary seems to grow by the day. If you’re in an egg-sistential quandary in the grocery aisle, here’s a cheat sheet on how to decipher egg dozens. A great article from Serious Eats on one of my favorite foods.

Click to read article: Extra Large, Cage-Free, and More: How to Shop for Eggs | Serious Eats

Tip of the Day – Never Refrigerate Bread…Freeze It!

Sourdough Whole Wheat BreadThe best way to keep bread is at room temperature. After 2-3 days, you should wrap the bread well, put it in a freezer bag and freeze it.  Never store any bread in the refrigerator, because the cold temperature (38º-40º) accelerates the crystallization of the starches, causing the bread to stale much faster. When I bake a bread, as soon as it cools completely, I cut it, freeze half immediately and keep the other half cut-side down on a cutting board covered with a clean cloth. When that’s consumed, I take out the frozen half, defrost it at room temperature or wrap it in foil and bake in a 450º oven for 10 minutes and it tastes just as good as the day it was baked.

Sourdough Starter – Drying and Reviving It (and how to get it for FREE!)

Dried Sourdough StarterIt’s always a good idea to have some dried starter on hand as backup if, for some reason,  your “live” starter suffers an untimely death…it’s sad, but it happens. It’s also a great way to share your starter with someone. The drying process is very simple. Thinly spread some of your live starter on a sheet of parchment paper or plastic wrap…a pastry brush or spatula works well here…then just let it dry. When completely dry (it can take from a few hours to a full day, depending on temperature), just peel it off the paper and crush it up…a coffee or spice grinder works well or you can just put it in a zip lock bag and whack it a few times with a rolling pin (that’s the post-whacked state in the picture on the left). Store it in an air-tight zip lock bag at room temperature or in the refrigerator or freezer…it’s all good.

Now, if your ready to get started, you’re going to need some dried starter to start your starter, so check out my Sourdough Whole Wheat Pumpkin Seed No Knead Bread post where you’ll find the link to send for some Carl Griffith’s Sourdough Starter…it’s been around since 1847! I’ve been using it for 20+ years, it’s excellent, and you can’t beat the price…literally…’cause you can get it here for FREE!

Reviving your dried starter is a relatively simple process also. This great video clip is from Breadtopia, one of my favorite sites, and it shows you exactly how to do it. If you’re into bread and baking, you should definitely check out Breadtopia for amazing recipes and videos.

Save

Save

Save

Save

Save

Brining…the Secret to Better Flavor and Texture

Cambro 6 qt. Container Perfect for Brining

I always prefer to brine pork or poultry before cooking. The brining process not only breaks down proteins and tenderizes the meat, but also adds moisture (through osmosis), making the meat “juicier” and also less likely to dry out when cooking.

I brine the meat in a clear plastic Cambro container as soon as I get it home from the supermarket. After brining, I wrap the parts in plastic wrap and freeze what I’m not going to use immediately. When I’m ready to use it in a recipe,  I simply defrost it, and since it’s pre-brined, it’s ready to go. Follow the jump for exactly how to do it.

Read More …

Sausage, Mushroom and Caramelized Onion Pizza with a Sourdough Whole Wheat Crust

SMO PizzaJust wanted to post a shot of the pizza I made tonight…it tasted as good as it looks. This was, of course, made from scratch and here is the printable recipe for the crust.  One of the most important tricks to making a great pizza is using a pizza stone…you just can’t bake a great crust without it. A pizza stone has a greater thermal mass then either a glass or metal pan and therefore holds and distributes heat better. It’s also porous, so it absorbs moisture from the dough as it cooks, all of which contributes to an amazing, crisp, uniformly browned crust. Also, get yourself a pizza peel…they’re inexpensive and make putting the pizza in and, more importantly, taking the hot pizza out of the oven, a breeze.

Pizza stones are available just about everywhere, and come in a variety of sizes and shapes (and prices). They should be put in a cold oven, then preheated for at least 30 minutes before using. Because they are porous and absorb liquid, the stone should never be washed with soap…just a dry brush or some plain, warm water if needed. They are also ideal surfaces for baking bread and also for making crispy, homemade crackers.

t stone or piece of ceramic or earthenware used to evenly distribute oven heat to pizzas or other baked goods, more or less mimicking the effects of cooking a pizza in a masonry oven. Such bakeware has more thermal mass than metal or glass pans. The porous nature of the stone used also helps absorb moisture, resulting in a crisp crust.

Sourdough Whole Wheat Pumpkin Seed No-Knead Bread

I have been experimenting lately with recipes for a simple no-knead whole wheat bread and I think I’ve come up with a one that seems to be pretty foolproof and gives consistently great results. Some sourdough purists might object to the use of instant rise yeast in addition to the sourdough starter, but I think for the novice sourdough baker, it insures that you’ll  get a good initial rise and excellent oven spring with an amazing sourdough taste. I’m currently using Carl Griffith’s sourdough starter, a strain of starter that is over 160 years old that can be obtained for a FREE at this address. This recipe is adapted from one on the amazingly informative Breadtopia website and solves the common problem of a too “wet” no-knead dough.  I recommend watching this excellent video at Breadtopia.com before making this bread…it  does a great job of demonstrating the techniques needed to make an incredible no-knead bread.

If you are just starting out baking bread, this is a great baking kit to start with. It includes a 9″ rattan banetton (bread proofing basket) with its linen liner (so dough doesn’t stick), a bread lame for scoring, and a dough scraper…just about everything you need to get started.

Click here for the recipe with photos.

Cookhacker’s Sourdough Whole Wheat Pumpkin Seed No-Knead Bread

Yields one 1 ¾ lb loaf
Course Side Dish
Cuisine American
Prep Time 18 hours
Cook Time 45 minutes

Ingredients

  • 340 grams (12 oz) All Purpose or Bread Flour
  • 142 grams (5 oz) Whole Wheat Flour
  • 321 grams (11.5 oz) Water
  • 62 grams ¼ cup Active Sourdough Starter
  • 1/8 teaspoon Instant Yeast
  • ¾ tablespoon salt
  • 40-50 grams lightly toasted pumpkin seeds and/or sunflower seeds...I use a combination of both
  • Vegetable Spray

Instructions

  1. Combine the two flours and salt in a large mixing bowl. In a large measuring cup, add the water, sourdough starter and the instant yeast and stir to combine.
  2. Add the wet ingredients to the dry ingredients and stir until mixed well (a dough whisk is the best tool for the job, but a wooden spoon works well also). Cover with plastic wrap and let the dough rest at room temperature for about 14 hours.
  3. At this point the dough should about doubled in size and be nice and bubbly on the surface. Flour your work surface and place the dough on it. Gently spread the dough out to about a 8” by 12” rectangle and sprinkle about a quarter of the pumpkin seeds across the surface of the dough. Then, as you fold the dough in thirds (as shown in the Breadtopia video) scatter each surface with more pumpkin seeds as you fold and then do a quarter turn of the dough and fold in thirds again and form into a ball. Top the dough ball evenly with the rest of the seeds and cover with plastic wrap and let rise for 15 minutes.
  4. Spray the proofing basket with the vegetable spray and sprinkle generously with wheat bran to prevent sticking (you can use cornmeal in place of the wheat bran). Flour your hands and invert the dough ball, seed side down, into the proofing basket, cover with a dish towel and let rise until doubled…about two hours. When you can poke your finger gently into the dough and if it doesn’t spring back, the dough is ready.
  5. About 30 minutes before the dough is ready, preheat the oven to 450 degrees. Put a 4-8 quart covered cast iron Dutch oven in the oven as it heats. When the dough is ready to go, gently invert the dough on a large piece of parchment paper. Carefully remove the hot Dutch oven, uncover it, lower the dough on the parchment paper into the Dutch oven, cover quickly and place back in the oven (if you don’t have parchment paper, the dough can be gently placed directly into the Dutch oven…just be careful).
  6. Cook covered for 20 minutes, then uncover and continue cooking till the bread reaches an internal temperature of about 200-210 degrees and is nicely browned, approximately 25 more minutes.
  7. Remove the bread and place on a cooling rack, let it cool for at least an hour (it continues cooking internally...cut it too soon and it will be "gummy") and in about 1 hour it’s ready to eat.

Killer Chocolate Chip Banana Bread

The bananas on the trees are ripening quickly and we are awash in a plethora of fruit, so we’re scrambling to come up with great banana recipes. Ripened bananas in their skin, wrapped in saran wrap, will keep in the freezer for up to six months for use in breads, cakes and smoothies, but it’s more fun to try and keep up with the rapidly ripening crop (it’s a race we can’t possibly win). Tonight, not only did we dehydrate them for banana chips, but also made this killer Chocolate Chip Banana Bread, a simple recipe that yields a moist, tasty, chocolatey loaf.  You can also add a little cinnamon, rum or vanilla if you like, but there really isn’t any reason to since it is delicious (and addictive…we can’t stop eating it) as is.

Please click here for the printable recipe.


Swiss Chard on Quinoa…Much better then it sounds!

One thing about Swiss Chard…it has to be really fresh for it to be really good. We picked this chard just hours before we prepared it using this recipe we found on Simply Recipes and it was exceptional. We served it on a bed of quinoa (keen-wah). If you haven’t tried quinoa, you should give it shot. It is a pseudocereal and is actually related to Swiss Chard and spinach. Quinoa is extremely nutritious and has a very high protein content (12%–18%), making it a healthy choice for vegetarians, vegans and athletes.  Unlike wheat or rice, which is low in lysine, quinoa contains a balanced set of essential amino acids for humans, making it an unusually complete protein source. We cook it like rice, using chicken or vegetable broth instead of water for extra flavor, and add sauteed diced onions and garlic to it before serving.

Kirkland Quinoa is an excellent quality, organic, gluten-free, reasonably priced brand if you want to give it a try.

Cool Tool…The Cast Iron Bacon Press

You gotta CRUSH that bacon flat!

One of the great all time nonessential-but-cool-to-have kitchen tools is the cast iron bacon press. You use it to keep bacon from curling up as it cooks, and that makes it great for topping sandwiches (like killer BLTs, bacon cheeseburgers, grilled cheese and The Ultimate Breakfast Sandwich). Used in conjunction with a heavy, seasoned Lodge 12″ Cast Iron Pan (an essential addition to any kitchen because of its excellent heat retention and diffusion properties), it’s also perfect for weighting down chops, burgers or steaks while pan-frying, which helps to keep more of the surface area of the meat in contact with the pan. This  browns them more evenly and helps develop complex flavors and aromas via the Maillard Reaction, all while forming a tasty caramelized crust. The cast iron bacon press is magic!